Are you looking for the best way to customize WooCommerce new order emails?
WooCommerce automatically sends an email notification to the store admin and the customer whenever a new order is placed.
These emails are meant to inform admins about the purchase and to confirm order details with customers.
But suppose you want to boost your branding, improve customer engagement, or add dynamic elements like product recommendations. In that case, you’ll find that customization options on WooCommerce new order emails are limited.
So in this article, we’ll explore how to customize WooCommerce new order emails using basic and advanced methods.
First, we’ll walk through the built-in WooCommerce email settings and how to make simple modifications.
Then, we’ll show you how to extend WooCommerce’s capabilities and enable features like customer segmentation, adding dynamic content, and automated email sequences using our powerful email marketing plugin – Mailster.
Let’s dive in and transform your WooCommerce emails into a more powerful marketing tool.
Why Customize WooCommerce New Order Email Settings
WooCommerce’s default new order emails serve a basic purpose: notifying admins about purchases and confirming order details for customers. But if you are going to build a stronger brand, improve customer relationships, and drive more sales, simply sending a generic confirmation email isn’t enough.
Here’s why customizing WooCommerce new order emails is essential for your business:
i. Improved Branding
Your emails are an extension of your brand. Customizing WooCommerce new order emails allows you to match them with your brand’s colors, logo, and tone of voice. A well-branded email looks more professional and leaves a lasting impression on customers.
ii. Better Customer Experience
A personalized email boosts the shopping experience. Instead of receiving a plain order confirmation, customers can get a warm thank-you message, helpful next steps, or even estimated delivery times, all of which build trust and engagement.
iii. Increased Sales with Upsells & Cross-Sells
New order emails are a great opportunity to recommend related products, offer exclusive discounts, or introduce loyalty programs. By adding dynamic content, such as personalized product suggestions or time-sensitive coupons, you can turn a simple confirmation email into a revenue-generating tool.
iv. Improved Order Management & Customer Support
Clear and informative emails reduce customer confusion. By customizing order details, shipping updates, and support information, you can minimize post-purchase inquiries and provide a smoother experience for both customers and your support team.
v. Advanced Marketing
With tools like Mailster, you can go beyond WooCommerce’s basic email settings. Segment customers based on purchase behavior, send automated follow-ups, or include dynamic content that keeps emails relevant and engaging. This level of customization helps you maintain a strong relationship with customers and encourages repeat purchases.
Now that you understand the benefit,s let’s dive into the step-by-step process of customizing WooCommerce new order emails, starting with the basic built-in settings and moving on to advanced enhancements with Mailster.
Simple Customization of WooCommerce New Order Emails
WooCommerce offers built-in settings that let you modify the content and design of your new order emails without needing custom code. Here’s how you can do it:
Step 1: Access WooCommerce Email Settings
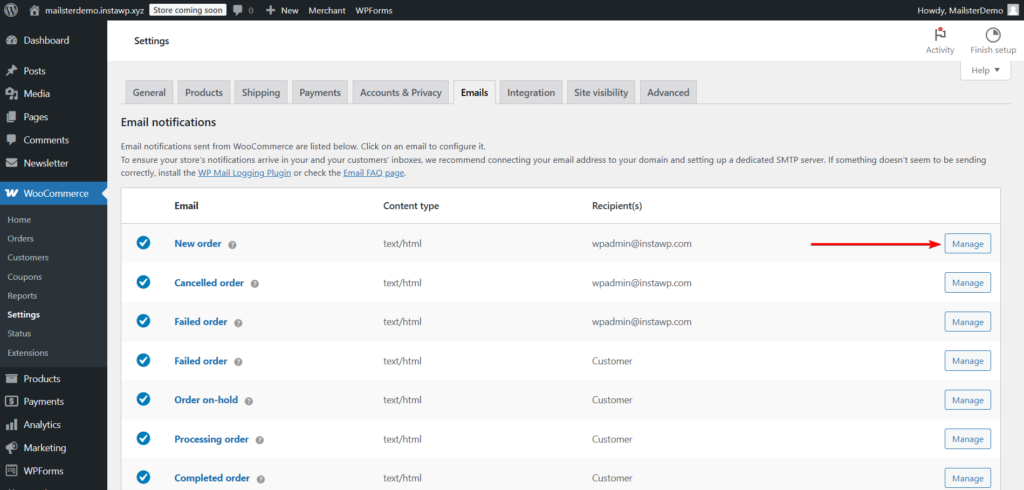
To customize your email templates, log into your WordPress dashboard and navigate to WooCommerce → Settings → Emails. Here, you’ll see a list of email templates that WooCommerce sends automatically based on order status.
Find New Order and select Manage to start customizing.
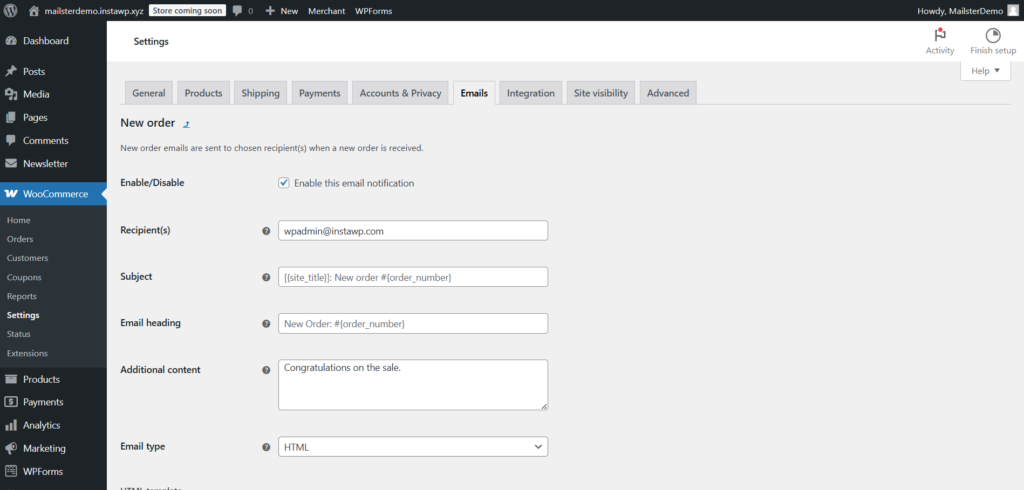
Step 2: Edit Email Content
WooCommerce allows you to modify:
- Email subject line – Customize how the subject appears in inboxes
- Email heading – Change the main heading inside the email
- Additional content – Add a thank-you message, customer support links, or other helpful details
You can also use placeholder values like {site_title}, {order_number}, and {order_date} to insert relevant order details dynamically.
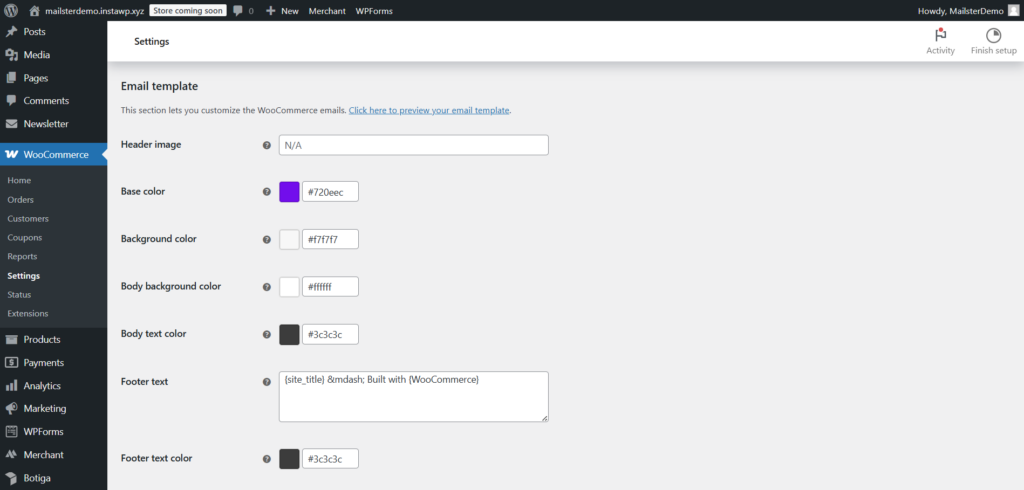
Step 3: Customize Email Design
To make design changes to the email, go to WooCommerce → Settings → Emails and scroll down to the end of the page to the Email Template section. Make changes as required:
- Header image – Add your logo or a branded banner.
- Footer text – Include contact details, website links, or legal information.
- Colors – Adjust the base, background, and text colors to match your brand.
Click Preview Your Email Template to see how your changes will look.
It’s worth noting that the design changes will be reflected in all your WooCommerce emails.
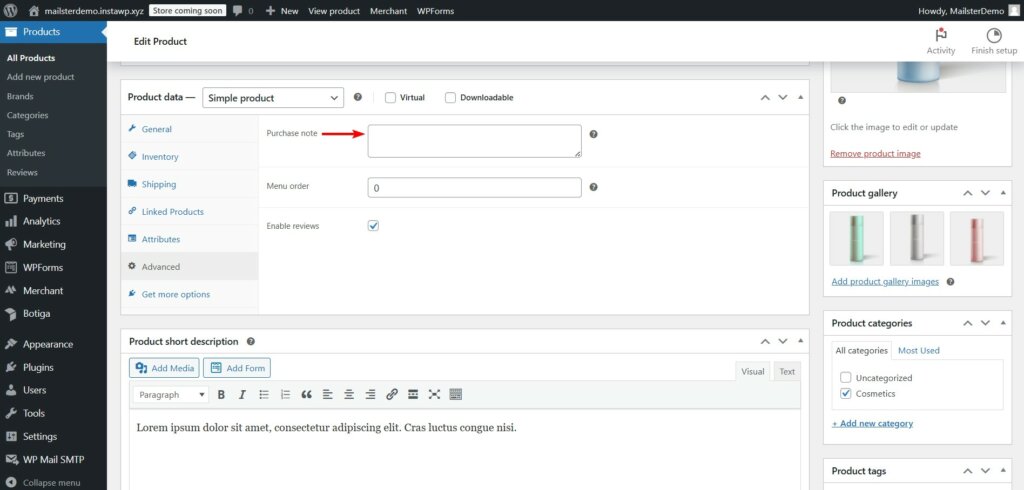
Step 4: Add Product-Specific Information
For even more customization, you can add a Purchase Note to individual products. This allows you to include special instructions, PDF guides, or discount codes in the new order email. To add a Purchase Note, go to Products → Edit the product, scroll down to Product Data → Advanced, and enter your message in the Purchase Note field.
This is a great way to provide additional value and keep customers engaged after purchasing.
Now that you’ve customized the basic email settings, let’s explore advanced ways to enhance your WooCommerce new order emails using Mailster.
Advanced Customization of WooCommerce New Order Emails
What is Mailster?
Mailster is a WordPress email marketing plugin that lets you create and automate email campaigns directly from your dashboard. Unlike cloud-based tools, it stores all data in your WordPress database, ensuring GDPR compliance and full ownership of subscriber info.
Key features:
- Familiar UI – Works like WordPress, making it easy to use
- Automation – Set up welcome emails, drip campaigns, and more
- Flexible Sending – Supports any email provider or your own server
- Templates & Personalization – 400+ templates and merge tags for dynamic content
- Unlimited Subscribers & Lists – No restrictions on growth
- Segmentation & Analytics – Target emails based on user behavior and track results
- Time-Zone Based Sending – Schedule emails for optimal engagement
- The intuitive interface – Accessible for both beginners and experienced marketers alike
For WooCommerce users, Mailster offers a separate WooCommerce plugin to automate store-related emails like new order emails and customer follow-ups. This WooCommerce add-on is free to use. But you’d need the premium Mailster plugin to be able to use the WooCommerce plugin.
The premium Mailster plugin is a one-time purchase plugin with three pricing tiers.
The Starter plan costs $79 per year and includes three automation, 10 prechecks per month, and 10 free email templates. The Professional plan is priced at $99 per year and offers 10 automation, 100 prechecks per month, and seven premium email templates. For agencies and advanced users, the Agency plan costs $199 per year and provides unlimited automation, 1000 prechecks per month, and access to all premium features. All plans come with unlimited subscribers, lists, and forms, along with a 14-day money-back guarantee!
Step 1: Set Up Mailster for WooCommerce
For advanced customizations to new order emails, you need the premium Mailster plugin and the free Mailster for WooCommerce plugin.
For the premium plugin, you need to purchase a license. Then install and activate the plugin and you’ll be prompted to enter your Mailster license key. Copy your license key from your Mailster account or the welcome email.
After adding the license key, an activation email will be sent to your registered email address. Open the email and click the activation button to complete the process.
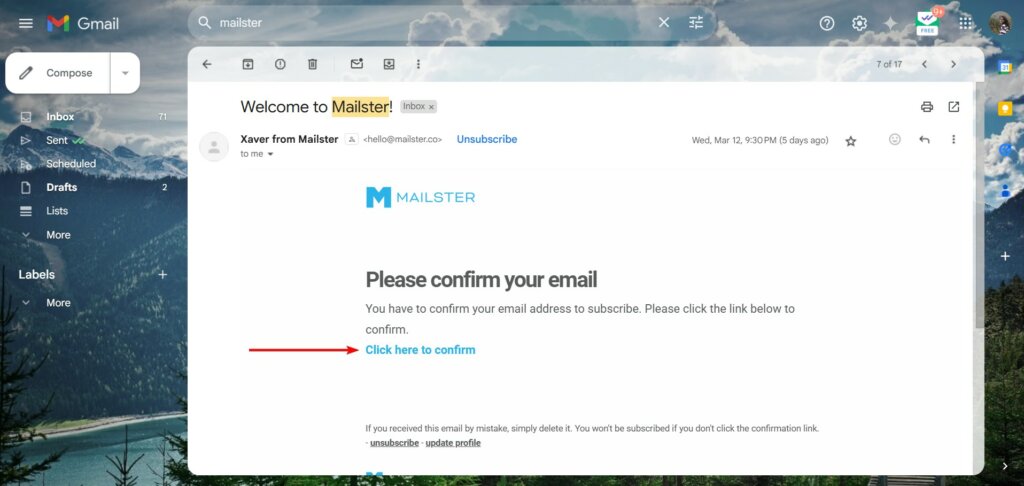
When Mailster is fully activated, proceed to install and activate the free WooCommerce plugin on your store.
Once both plugins are up and running, you’re ready to start customizing your WooCommerce new order emails with advanced automation and personalization.
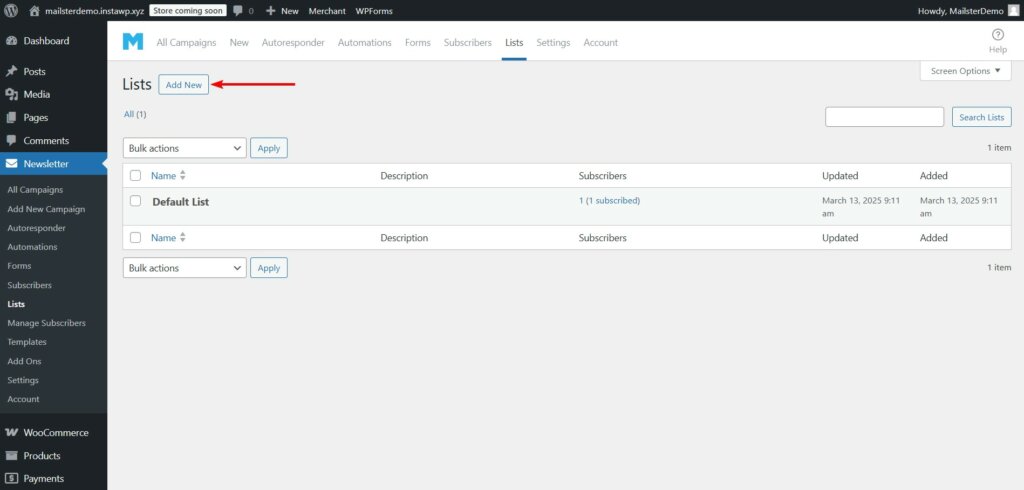
Step 2: Create a Customer List
Navigate to Newsletter → Lists in your WordPress dashboard, click Add New, name it (e.g., “New Order Customers”), and hit the Save List button. This is where details of customers who purchase products will be stored.
Step 3: Customize Pre-Built Email Templates
Mailster offers a variety of pre-built email templates that you can customize to align with your brand’s identity. These templates provide a professional look while allowing flexibility to modify content, colors, and structure.
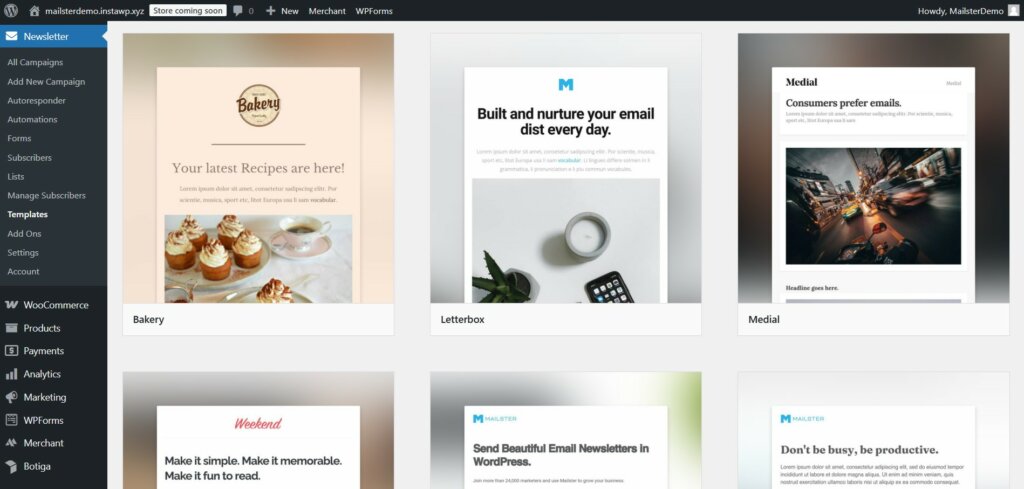
i. Access & Edit an Email Template
To access Mailster email templates, navigate to Newsletter → Templates in your WordPress dashboard. Select a template you want to customize by clicking on it.
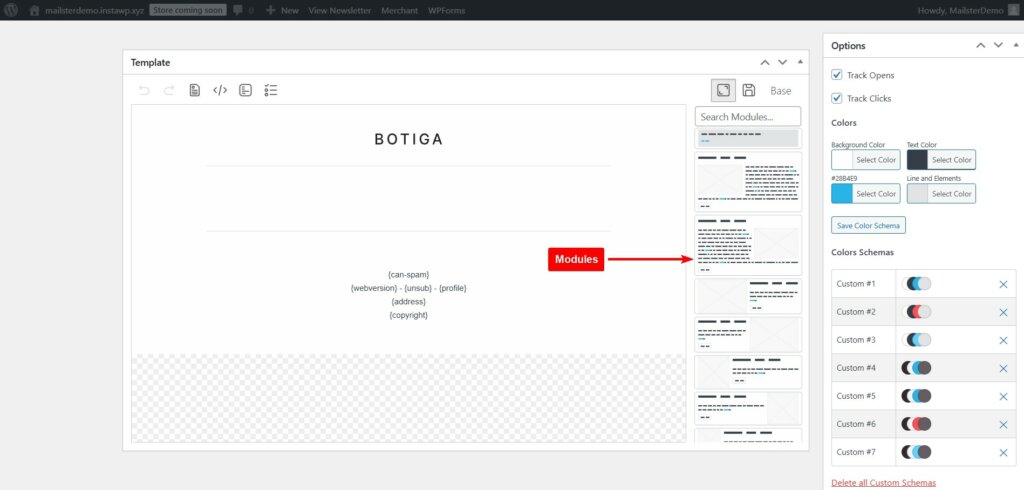
Mailster templates are built using modules, which are pre-designed sections that help structure your email layout. These modules function like blocks in a page builder, allowing you to drag and drop elements such as text, images, buttons, and dividers.
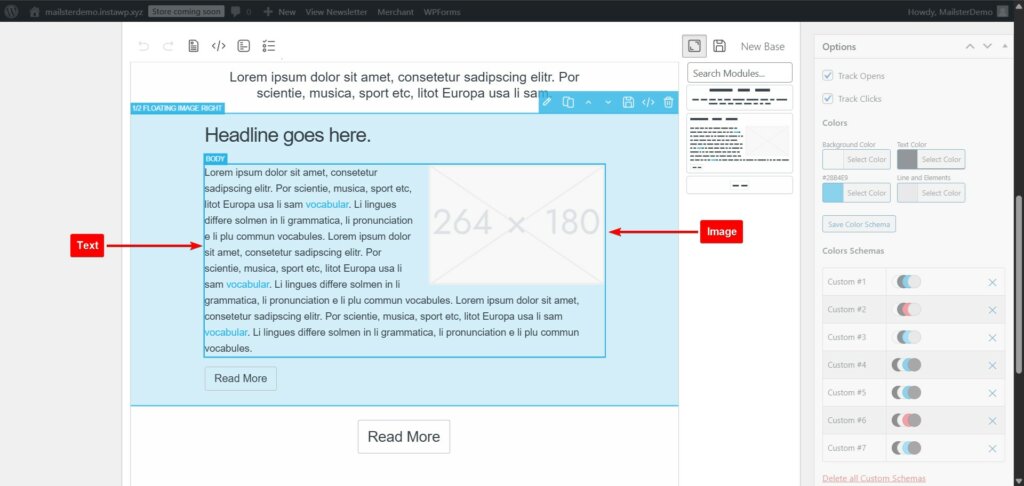
Modify text elements by clicking on them and typing your content. Use formatting options to adjust text size, color, and alignment.
You can replace default images with your brand’s logo or relevant visuals. Click on an image block and select Replace Image to upload a new one. Ensure images are optimized for email by using lightweight file formats like JPEG or PNG.
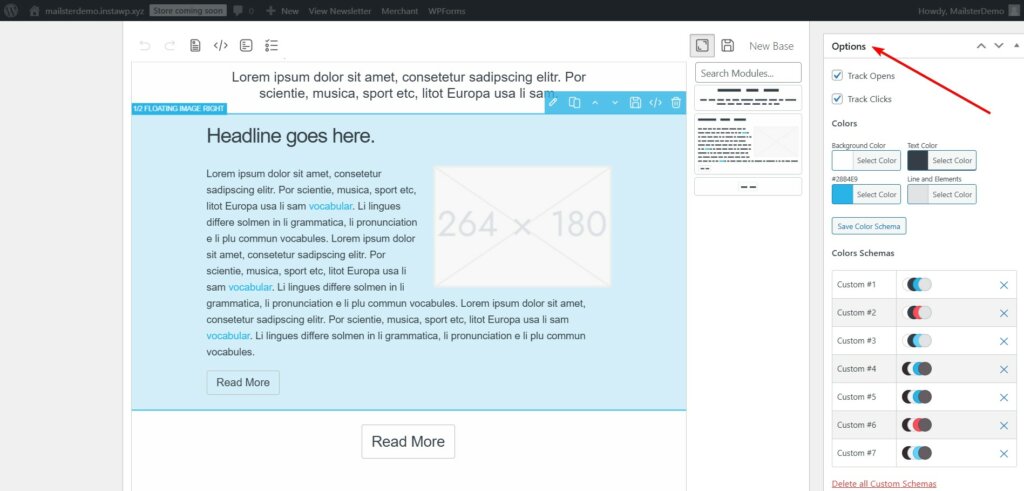
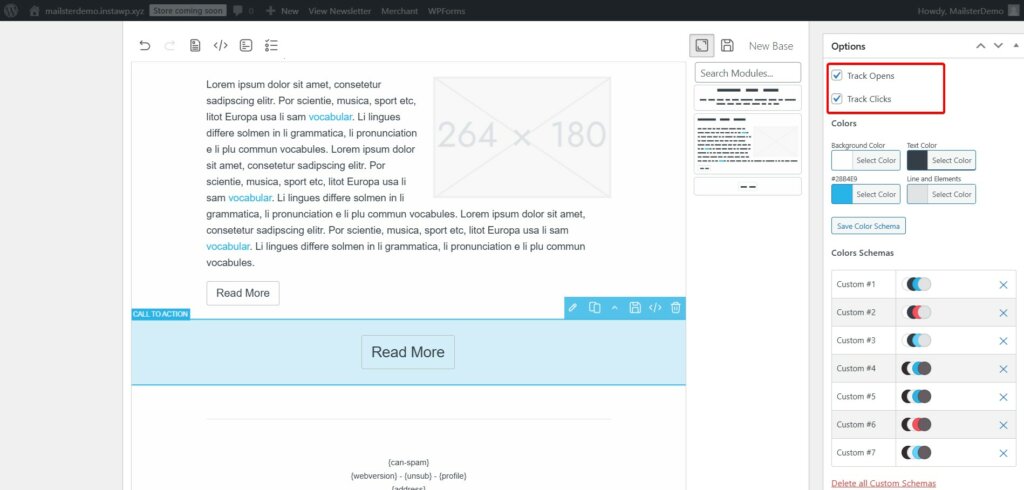
In the email editor, locate the Options section and adjust colors to match your brand’s theme. Also, select font styles that align with your brand’s typography.
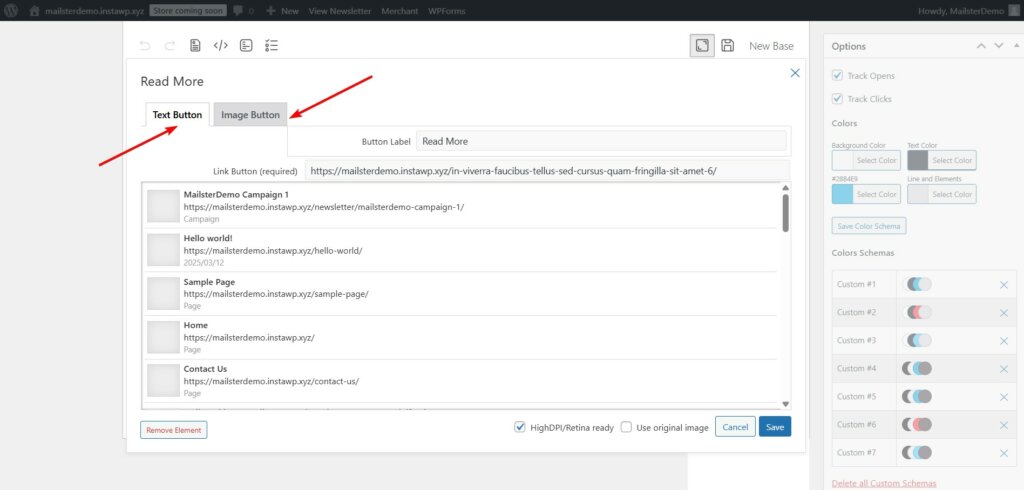
Use the CTA module to add a text or image button and link to any post or page from your WooCommerce store.
You can customize existing modules to fit your needs or create custom modules for reuse in future campaigns. To save a custom module, modify an existing one, then click the Save icon. Saved modules will appear in the module selector for quick access in any email campaign.
ii. Track Open & Click Rates
You should find the Track Opens and Track Clicks options on the email editor above the color schemes. Ensure the options are selected so Mailster can track open and click rates.
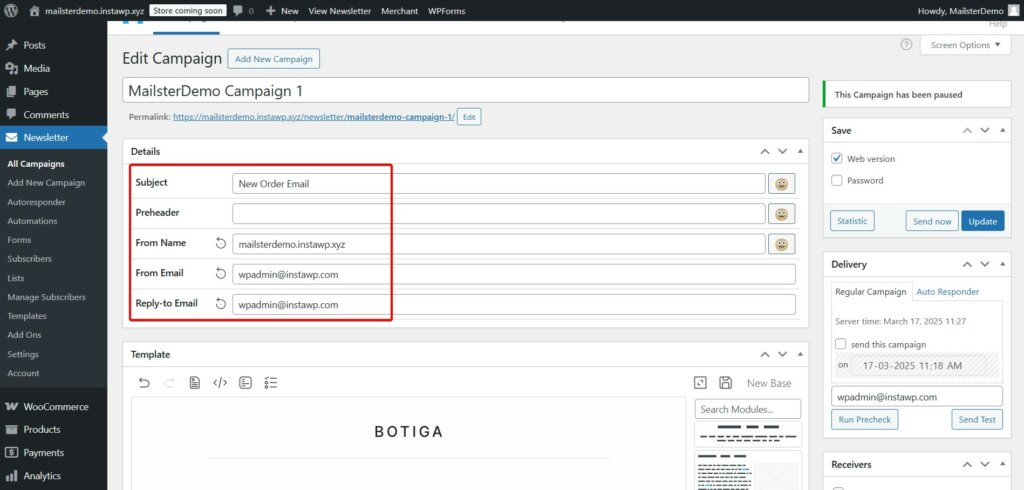
iii. Add Sender Details
Make sure the email campaign has a name and details such as placeholder, subject line, name, and sender email addresses are filled.
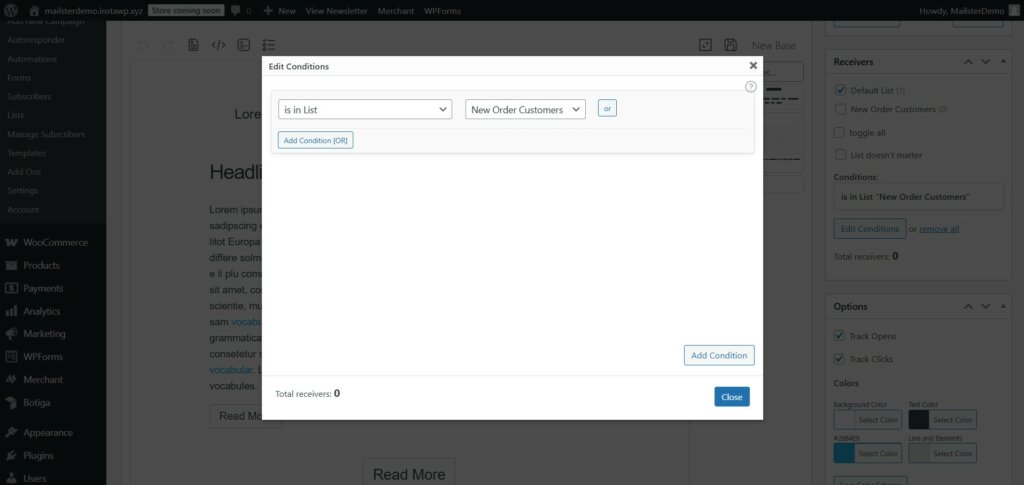
iv. Define Conditions for Recipients
In the Receiver meta box, click Edit Conditions. A popup will appear where you can add conditions. Select “is in List” and the name of the email list you created back in Step 2. This will ensure that only recipients from that list are being sent the customized new order emails.
That’s it. That just about covers everything you need to do to create a customized new order email template with Mailster.
Once the customization is complete, hit the Save or Update button to save all your customization.
Step 4: Create an Automation
When setting up Mailster to handle your WooCommerce new order emails, you need to configure the proper conditions to ensure it triggers automatically for new purchases.
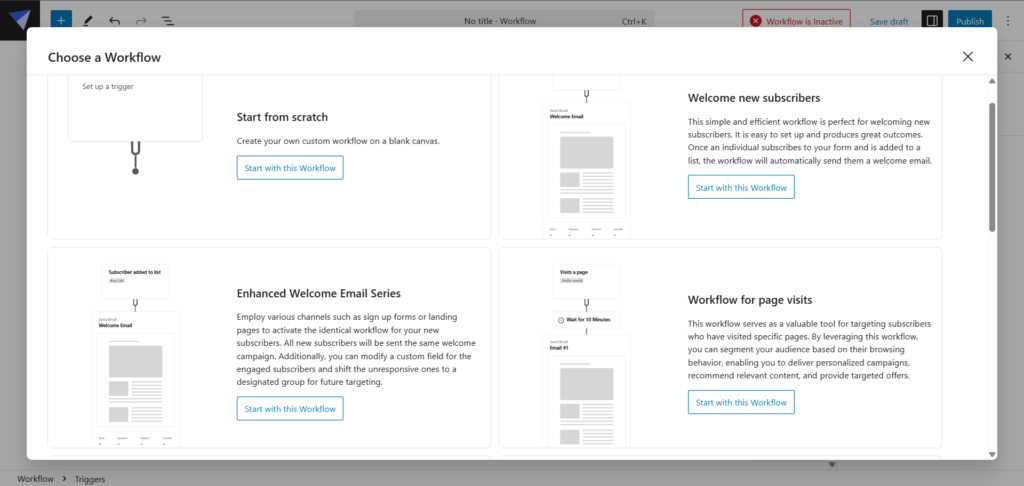
In your Mailster dashboard, navigate to Automation and create a new automation specifically for new orders. Set the automation to trigger when a new order is placed. This ensures your custom email will be sent whenever a customer completes a purchase.
You can tweak Mailster’s existing automation templates or create one from scratch. We already have comprehensive guides on how to create automations so we won’t cover the steps here. Please consult the knowledge base documentation for assistance.
Step 5: Disable Default New Order Email
This step is crucial to replace the default WooCommerce emails with your customized Mailster version.
To disable the default WooCommerce new order emails, go to WooCommerce → Settings → Emails, find the New Order notification, click Manage, and uncheck Enable this Email Notification.
This prevents customers from receiving duplicate emails.
After setting these conditions, your customized Mailster email will automatically trigger with each new order, replacing the default WooCommerce email with your more engaging, brand-consistent version.
Step 5: Test the Customized Email
Thorough testing ensures your emails display correctly across different email clients and devices, preventing potential delivery or formatting issues
On the email editor, go to Delivery and hit the Send Test button. Check formatting across different devices. You can make further adjustments if necessary before using the template in a real campaign.
NOTE: If you need even more control over your email design, Mailster allows you to create custom templates tailored to your specific needs. This gives you full flexibility over layout, branding, and content structure.
By following these steps, you can ensure that your Mailster email templates are fully customized to reflect your brand’s identity and deliver a professional experience to your subscribers.
Need more assistance? We have a comprehensive knowledge base answering all your questions on how to use Mailster. You can also contact us for additional support.
Frequently Asked Questions (FAQs)
Here are answers to some common questions about WooCommerce order emails to help you troubleshoot and optimize your setup.
How to get notified of a new order in WooCommerce?
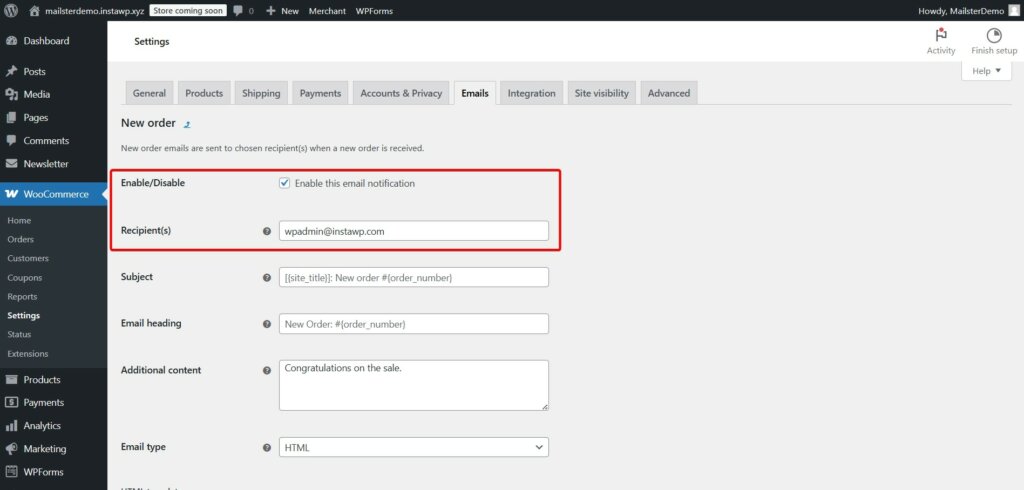
WooCommerce automatically sends a new order email notification to the site administrator when a new order is placed. To ensure this feature is active, navigate to WooCommerce → Settings → Emails in your WordPress dashboard. Locate the New Order email notification and verify that it is enabled and that the recipient’s email address is correct.
You can also add additional email addresses in the recipient field, separated by commas if you want multiple team members to receive new order notifications. This is particularly useful for larger stores where different departments may need to be informed of incoming orders.
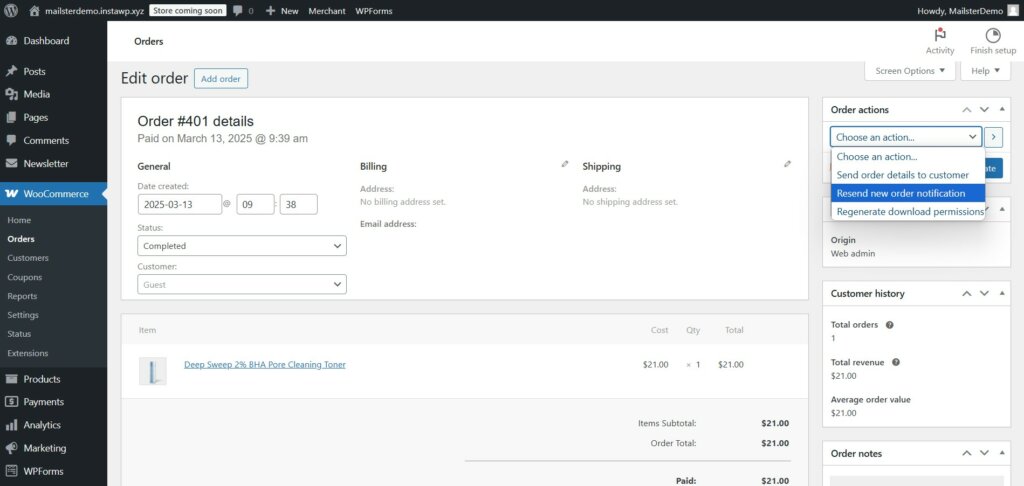
How to resend a new order email in WooCommerce?
To resend a new order notification, go to WooCommerce → Orders on your WordPress dashboard and select the order. Next, on the order editing page, go to Order Actions from the dropdown menu, choose Resend New Order Notification, and hit the Update button.
This feature is especially helpful when an email might have been missed or when you need to send the notification to a different email address after making changes to your email settings.
You can verify that the email was sent by checking the order notes section, which will display a timestamp of when the notification was resent.
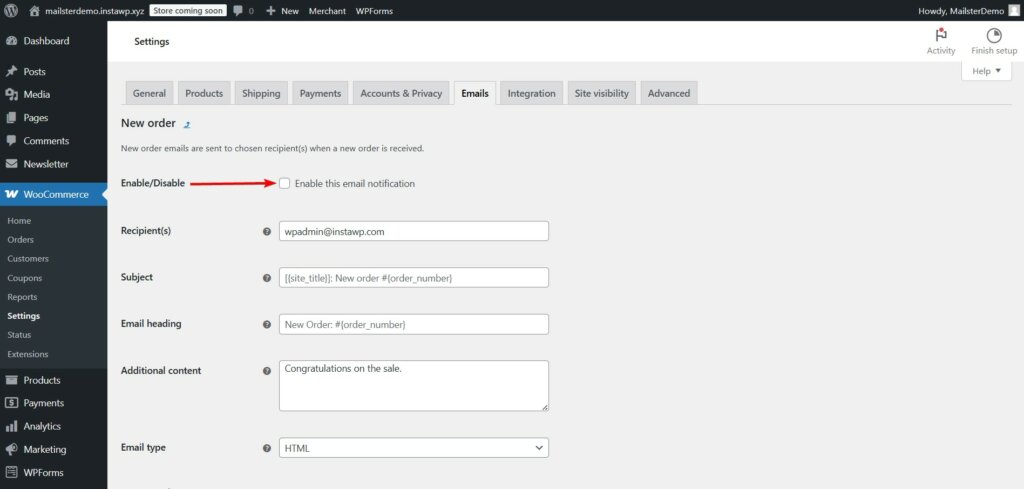
How to turn off new order email in WooCommerce?
To disable the new order email notification, navigate to WooCommerce → Settings → Emails in your WordPress dashboard. Find the new order email notification and click Manage. Uncheck the Enable This Email Notification box. Save the changes.
This option is particularly useful when you’re using a third-party email service like Mailster to handle your order notifications or when you prefer to consolidate all your communications through a single platform. Remember that disabling these emails will prevent automatic notifications, so ensure you have an alternative system in place to track incoming orders.
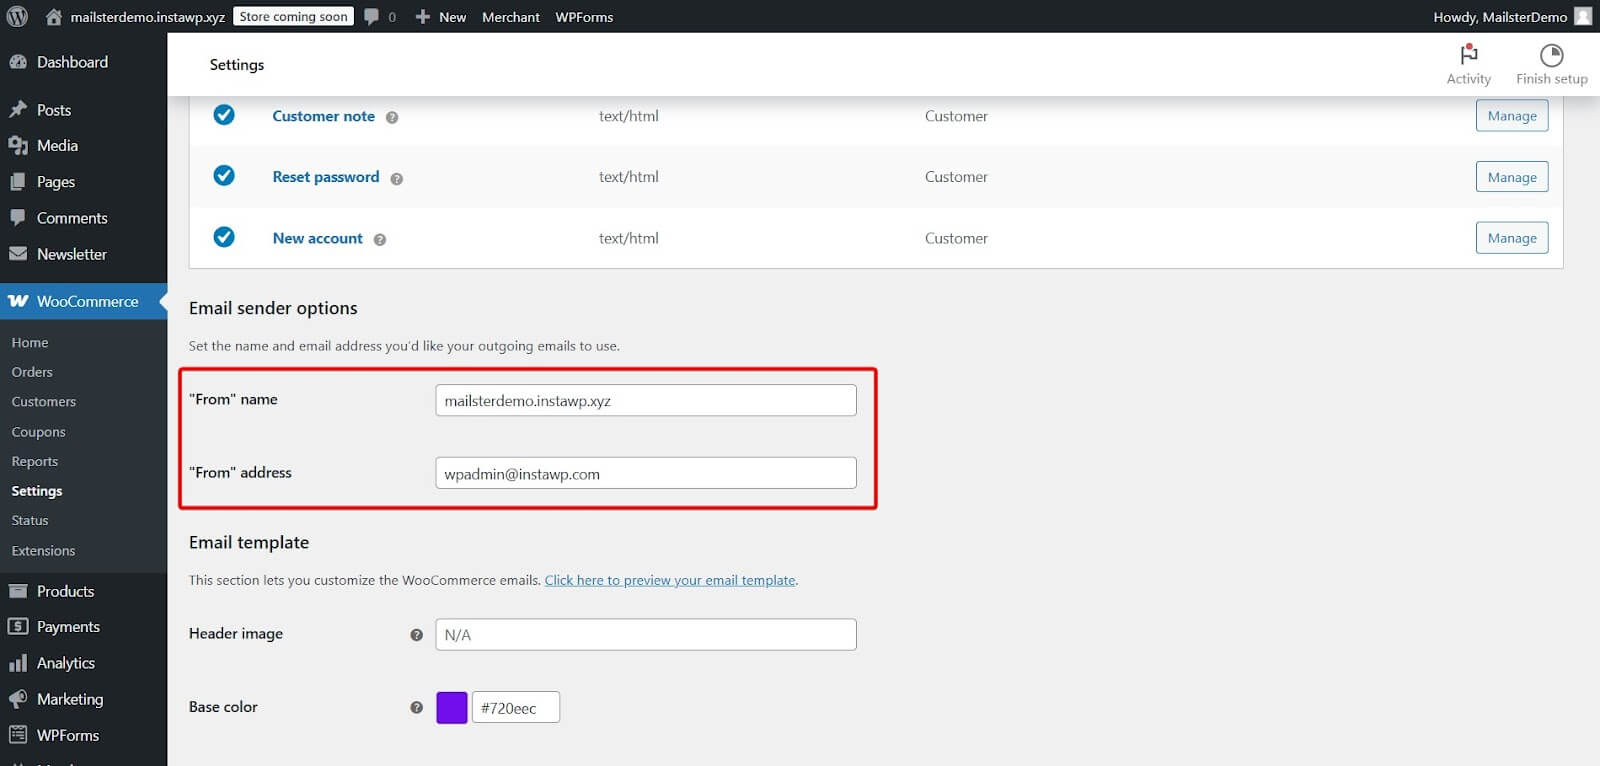
How to customize the sender name and email for WooCommerce order notifications?
You can customize both the sender name and email address for all WooCommerce emails. Go to WooCommerce → Settings → Emails and click on the Email Sender Options section. Here, you can change the “From” name that appears in the recipient’s inbox and the email address from which notifications are sent.
Using a recognizable sender name like your store name and a professional email address that matches your domain (e.g., [email protected]) can help improve email deliverability and build trust with your customers.
Conclusion
Customizing WooCommerce new order emails is a powerful way to strengthen your brand, improve customer experience, and drive additional sales.
While WooCommerce’s built-in settings allow for basic modifications, leveraging a tool like Mailster unlocks advanced personalization, automation, and segmentation.
With Mailster, you can go beyond static order confirmations and create dynamic, targeted emails that engage customers, reduce support inquiries, and encourage repeat purchases.
Whether you’re adding branded visuals, upselling products, or sending personalized follow-ups, these enhancements help turn every new order email into a valuable marketing opportunity.
That’s all for now, folks!
If you found this guide helpful, take a look at other such guides and tutorials on our blog.